Head-Up Display
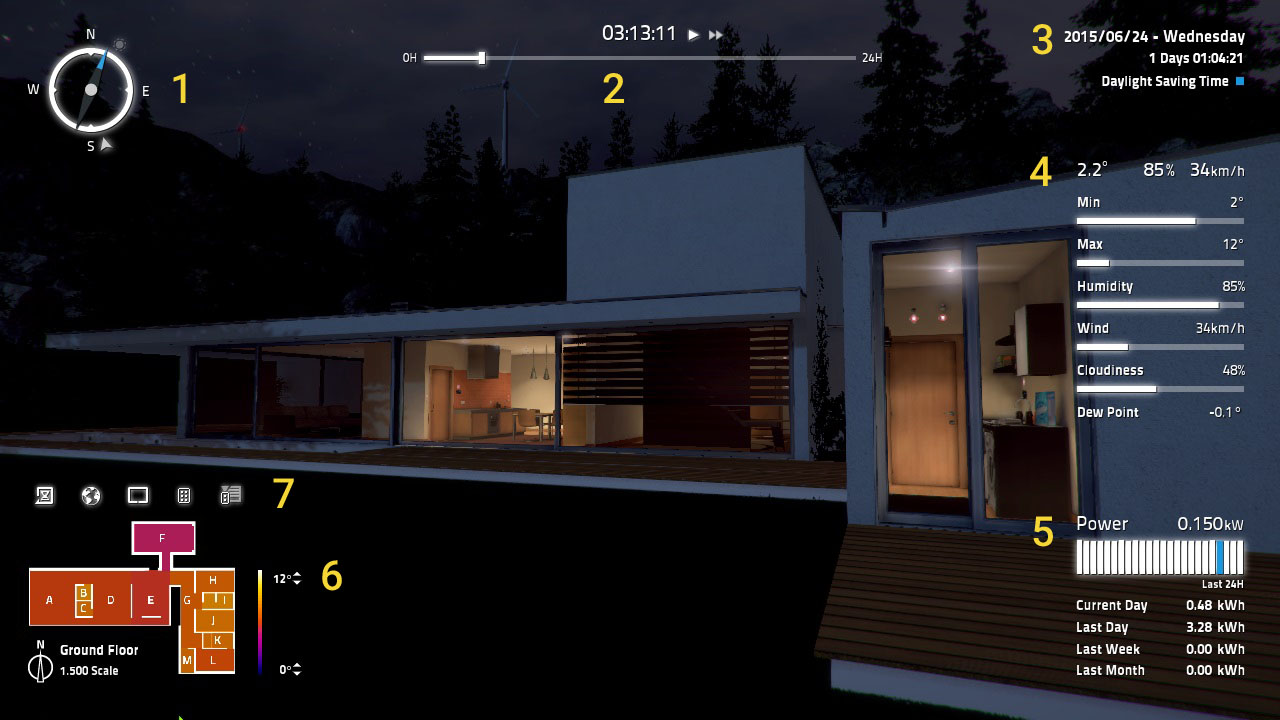
1. Compass
The blue arrow points to the North.
- Sun Icon : Indicates the sun position and visibility.
- White Arrow : Click and drag to set the wind direction.
- Compass Frame : Click and drag to change the compass orientation.
2. Time Slider
The time slider represents one day, from 0 to 24 hours. It can be used in two different ways:
- Accelerate time until it reaches an hour defined the Time Marker. Left-click and Drag the marker to set the desired time. This will fast forward the day until 5 seconds before the desired time. If the left or right Shift key is pressed the marker will snap each interval of 10 minutes. Press the Play Button to set the simulation speed to 1x.
- Accelerate time by clicking on the Fast-forward Button. Each click will increase speed by 50x, 500x and 5000x respectively.
3. Time Panel
Provides information about the simulation running time.
- Date : Current simulation date.
- Stopwatch : Measures the elapsed time and resets when clicked.
- Day Light Saving Time : Toggle to set it on or off.
4. Weather Panel
The first three values show the air temperature, relative humidity, and wind speed.
- Min : Sets the minimum air temperature of the day, reached when the sun is at the lowest elevation angle.
- Max : Sets the maximum air temperature of the day, reached when the sun is at the highest elevation angle.
- Humidity : Sets the relative air humidity.
- Wind : Sets the wind speed, and the wind direction can be set on the compass by dragging the white arrow.
- Cloudiness : Sets the amount of clouds.
5. Power Panel
The bar chart shows the energy consumption per hour. The Blue Bar represents the consumption of the first hour of the day (after midnight).
- Power : Instant energy consumption (kW).
- Current Day : Energy consumption/cost of the current day.
- Last Day : Energy consumption/cost of the previous day.
- Last Week : Energy consumption/cost of the previous week, from Sunday to Saturday.
- Last Month : Energy consumption/cost of the previous month.
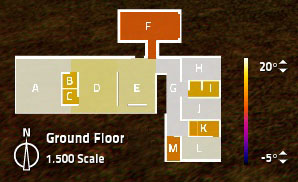
6. Minimap
The Minimap is used to identify the different rooms, the character’s position and orientation and for fast navigation between rooms. Each room color indicates its temperature based on the thermal color scale shown on right side of the minimap.
- Click to navigate to the selected room.
- Outdoor areas next to doors and windows are also clickable.
- Click on the Ground Floor or 1st Floor to switch floors.
- Define the temperature range by setting the minimum and maximum values on the thermal scale.
- The green arrow represents the character’s location and orientation.
7. Toolbar
| Button | Action |
|---|---|
 |
Opens the date menu. When a new date is set, the energy values are reset. Click on Accept to apply the new date or Cancel to return to the simulation. |
 |
Click to open the atlas menu. Click on the map to set the geographic location or insert the latitude and longitude coordinates in the respective fields at the top of the map. Click on Accept to apply the new coordinates or Cancel to return to the simulation. |
 |
Opens the Smart Home Console. Click on the power button to close the console. |
 |
Opens or closes the programmable remote control. |
 |
Opens and closes the remote control which can be used to control the entrance gate, garage door and the alarm central. |